I always knew I wanted to make my own wedding cake, so when the time came I was all for it – even if others took some persuading. Thankfully I had encountered plenty of people who have done this for themselves. I was fairly optimistic that I had learnt from their sometimes very stressful experiences, and picked up some good methods making a few wedding cakes over the years. So with a few helpers, and a plan (which was very flexible) I did it!
It turns out that when you spend a lot of time looking at cakes, the phrase ‘spoilt for choice’ does not even come close to the issue off choosing a design. Then you consider that the groom also had his input on flavours and designs. And then the helpers too – if someone if helping with such a large potentially stressful task they get some input too. Nothing was quite right, until geometric cakes with hexagons appeared on Pintrest. Thankfully the Sugarcraft guild ran an airbrushing class with Dinky Doodle and that helped to solidify the plans – it more confidence in air brushing and let me see the colours in real life too. So colours and hexagon cutters were ordered and all the bits like boards and dowels (always straws for me). Due to the family love of Hearts and the colours of the tartan, shades of red were chosen.
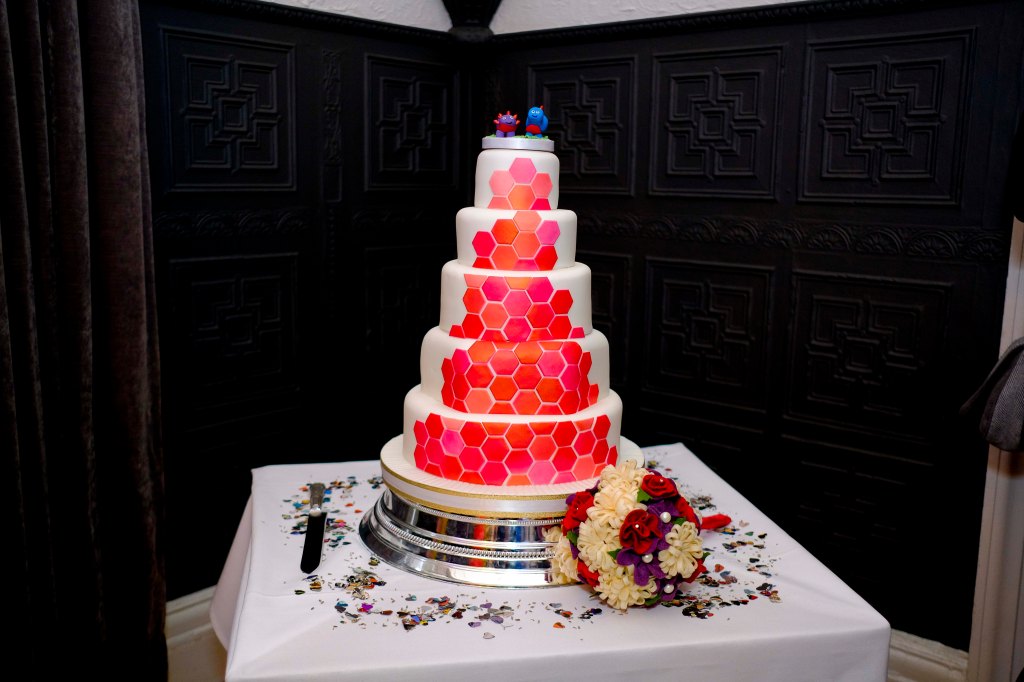
One of the best discussions was how many tiers the cake would have. We were both happy to stick with 3 tiers, a standard wedding size and enough for our guests. Turns out my key helper, my mum, was keen to go slightly bigger than usual and I did not need much encouragement, so 5 tiers was agreed. Mostly round with one hexagon shaped tier for a bit of interest. Thankfully Paper Lace helped with the sizing of that and there was much stacking of tins and boards to get the right look – always check in what direction your hexagontins/ boards are measured in!
There was a lot of debate on flavours, but really, you can’t go wrong with the classics – chocolate, Victoria sponge and lemon. The two smaller tiers we made life easier for ourselves – rocky road and toffee crispy cake. That also meant they could be made quickly and set quickly, so less oven time. There was also another sponge for our free-from guests. With family and friends with various allergies/ intolerances, there was no chance I would have a cake without some consideration of this.
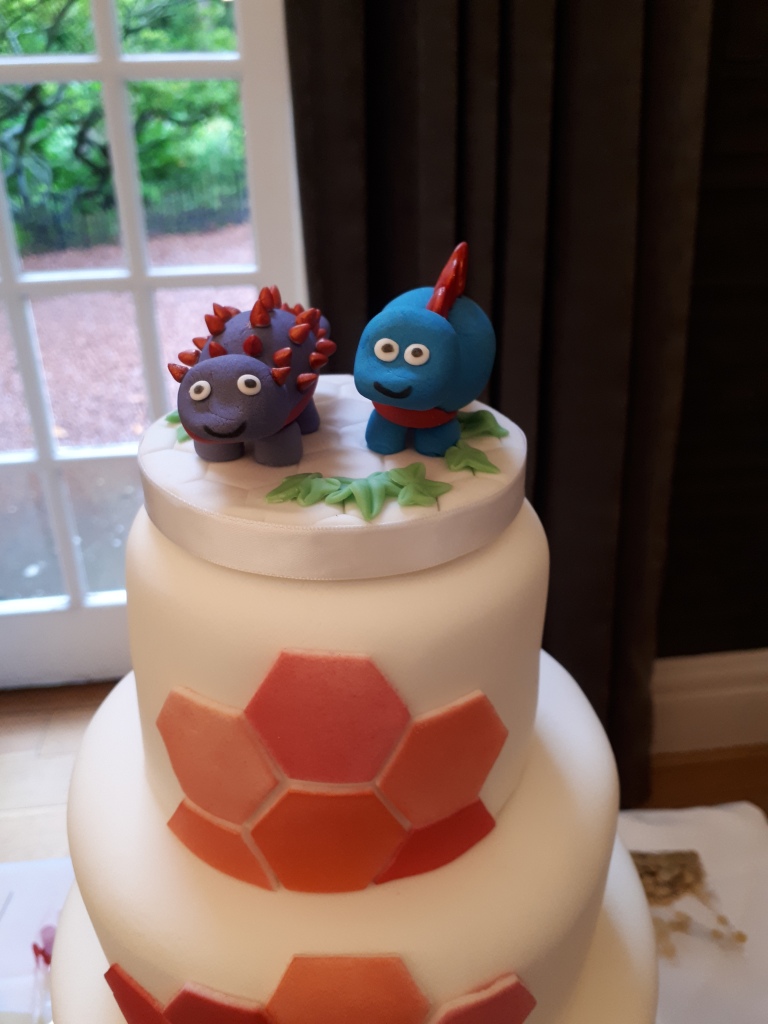
Mum was in charge of baking, I was icer and decorator. Deciding on the cake topper took a bit more time too – we didn’t want people, so as it was at Edinburgh Zoo we had looked at jungle themed decorations, then dinosaurs popped up, which we loved. So dinosaur toppers it was! They were made a little in advance of everything else. The smallest hexagon cutters made an indentation on the board, and a few leaves to decorate it a little. Some of the air brush colour was painted on for the dinosaur details.
It took a fair bit of time to get everything baked, buttercreamed and covered in sugar paste – but keeping things simple with just using one colour of sugar paste helped.

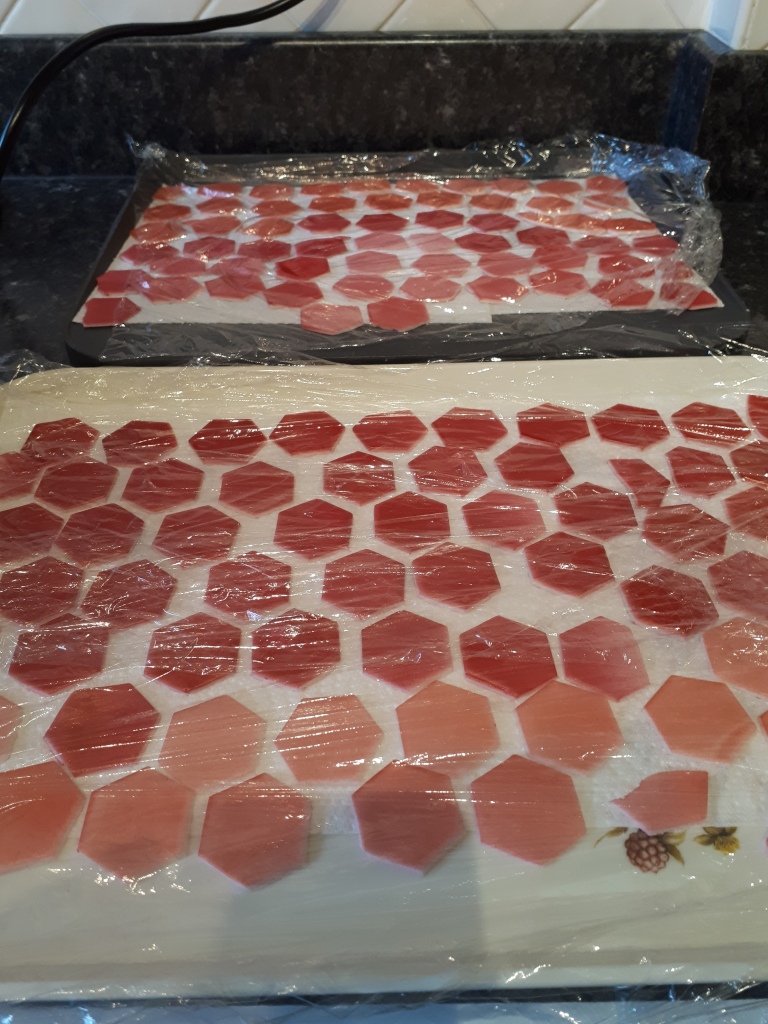
The next step was hexagons. Lots of hexagons. A brief experiment showed that air brushing and then cutting was going to work better than cutting then airbrushing – the shapes were prone to moving under the air brush, and cutting afterwards left nice clean edges. I mostly went with using the colours as they mixed in the airbrush – started lighter, worked up to darker, with a bit of shimmer. So they stayed softer they were covered in Clingfilm to stop quite so much air getting to them – this gave me longer to work with them.

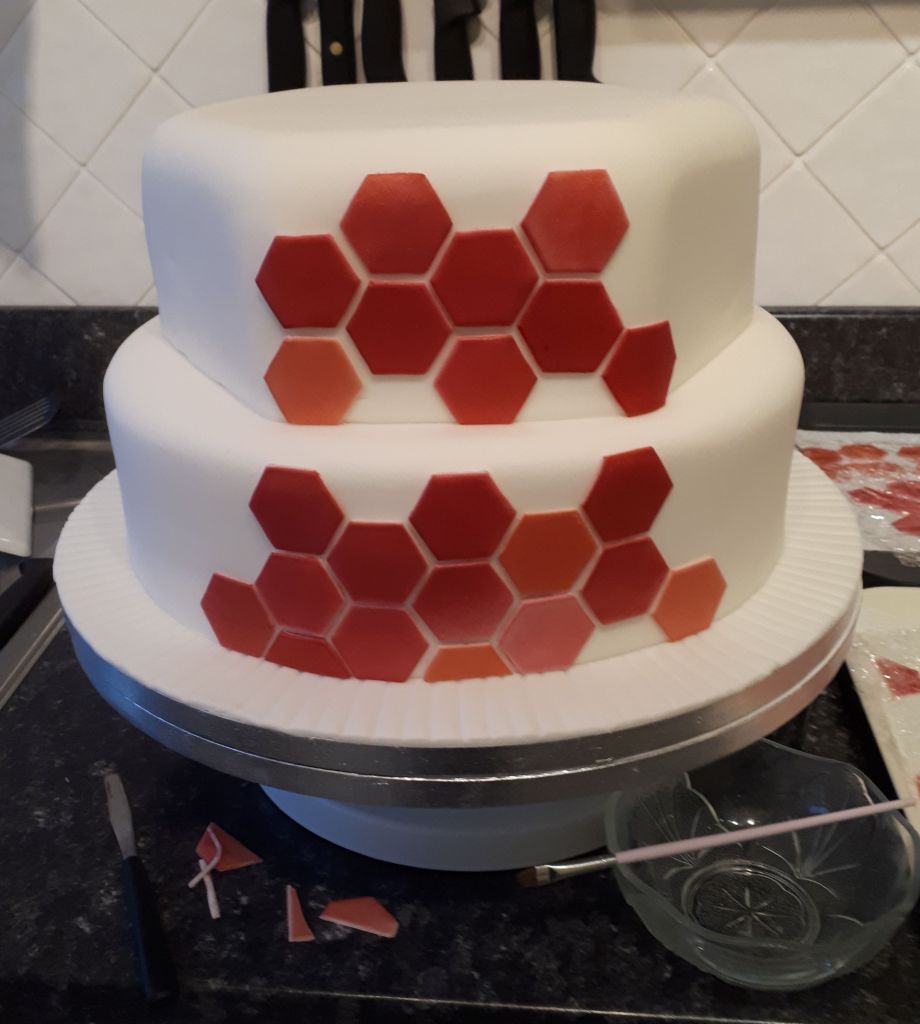
Then a large bit of imagination was required, as only the bottom two tiers were transported stacked. Gaps had to be left to allow for movement and assembly, so I had to visualise how the pattern would work once it was stacked together, and the plan was for there to be a bit of a colour gradient from bottom to top.

The board was decorated with my favourite technique (along with grass) – indenting lines with the end of a paint brush. It looks nice, is easy, and camouflages any joins in the sugar paste.
For any wedding cake, I always bring a cake kit – for any assembly but also emergency repairs! This time the kit included more hexagons – layered on baking paper for being non-stick, and kept in an air tight box so that they stayed soft. This worked really well, so the colours didn’t crack or shift either.

With the cake assembled the toppers were added. We knew we wanted the cake on display throughout the day not revealed 30 minutes before it gets cut – thankfully the lay out of the Mansion House lets this happen!

Another priority in planning the cake was that we both got to EAT the cake. So when the cake was cut, we were straight in to that queue! I’m pretty sure I had a bit of everything!
I really enjoyed the whole process of making our wedding cake. It helped that we had a lot of help, that there was not a lot of last minute details to sort out and that we had time off work to do it all. My advice for anyone else doing this is have a good plan, a design you are confident in, and be prepared that things might get downscaled if time runs out – I would absolutely recommend it!